Cordless Vacuum Cleaner
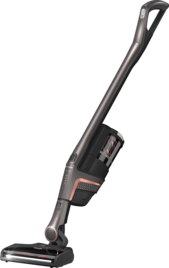
LED on handle is flashing
The LED of the suction power selector is flashing on the vacuum cleaner handle.
The battery is discharged.
Charge the battery without wall mounting:
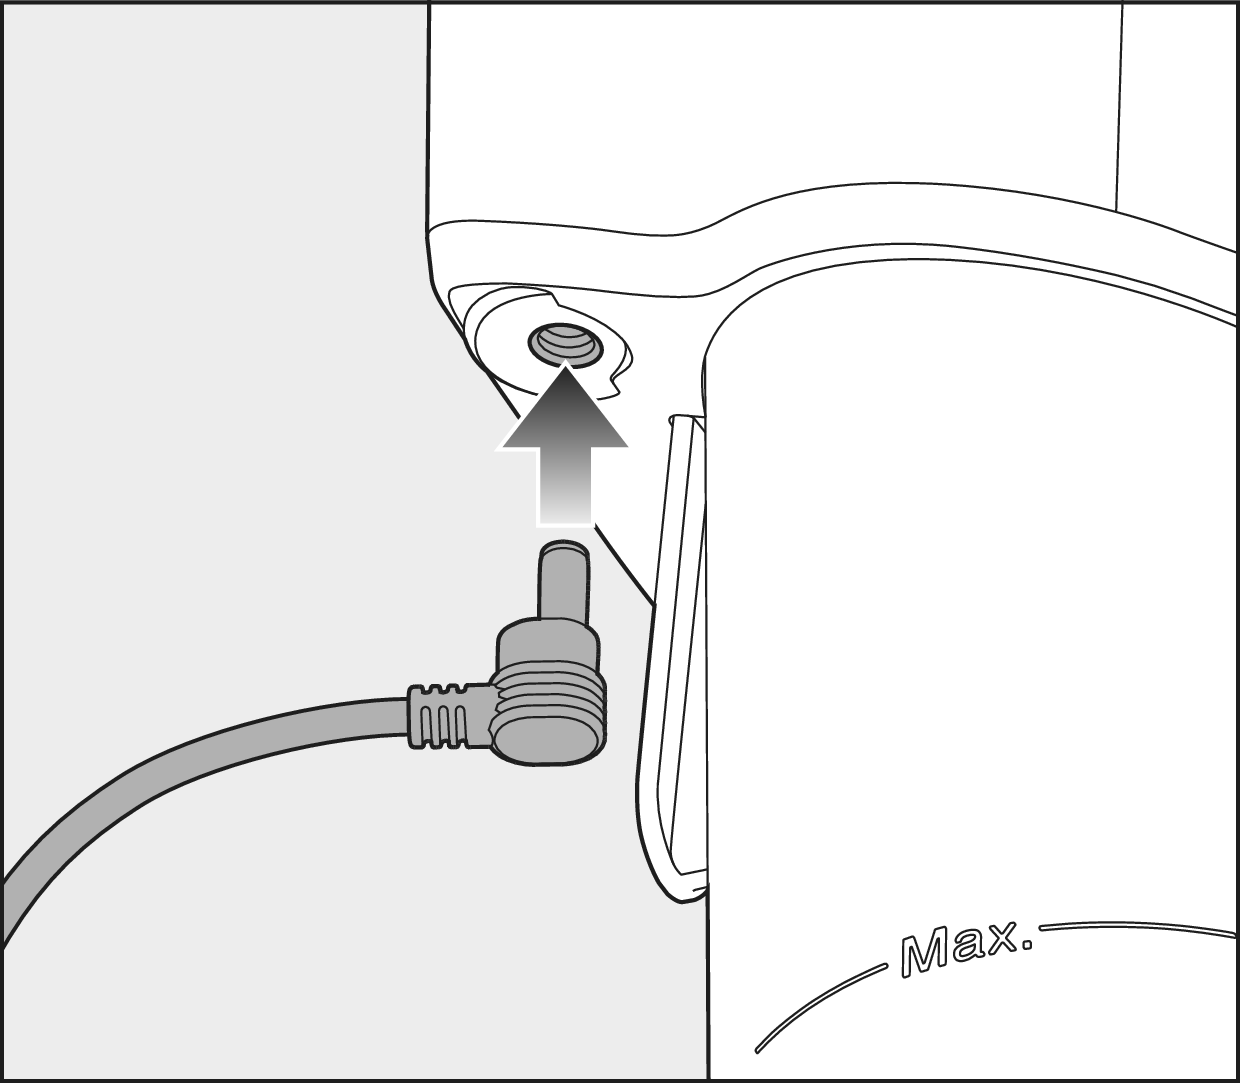
You can charge the battery directly.
Plug the charging plug of the supplied charging cable into the charging socket on the bottom at the rear of the PowerUnit.
Plug the charger into a power socket.
The charging process will start.
Charge the battery with wall mounting:
Not valid for United Kingdom and Ireland!
Standard wall bracket:
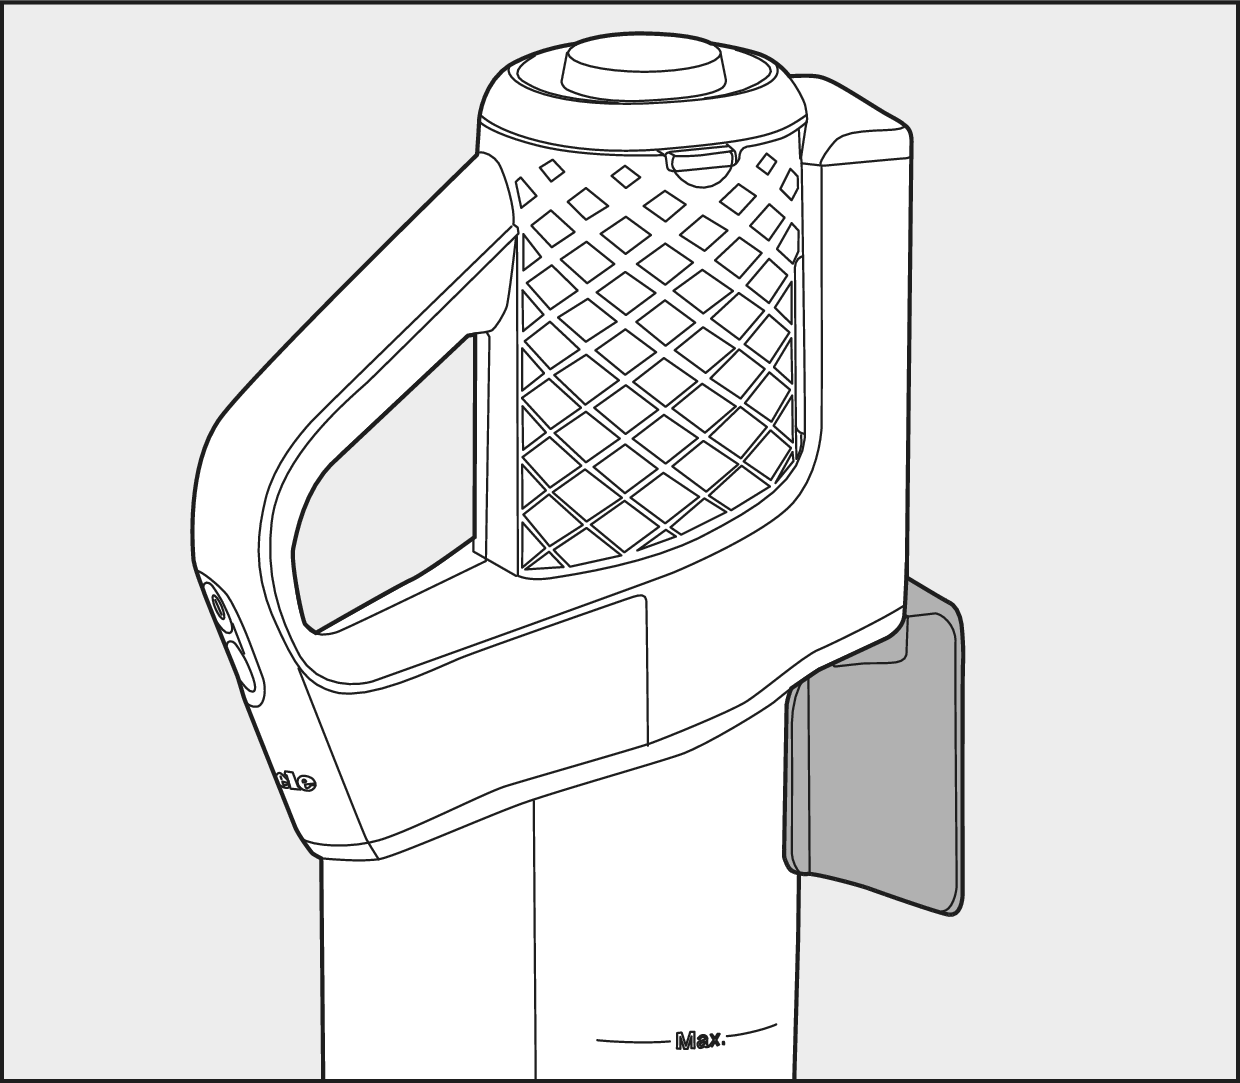
Place the vacuum cleaner into the wall bracket from above.
Plug the charger into the power socket.
The charging process will start.
Not available in United Kingdom and Ireland!
SpeedLock wall bracket:
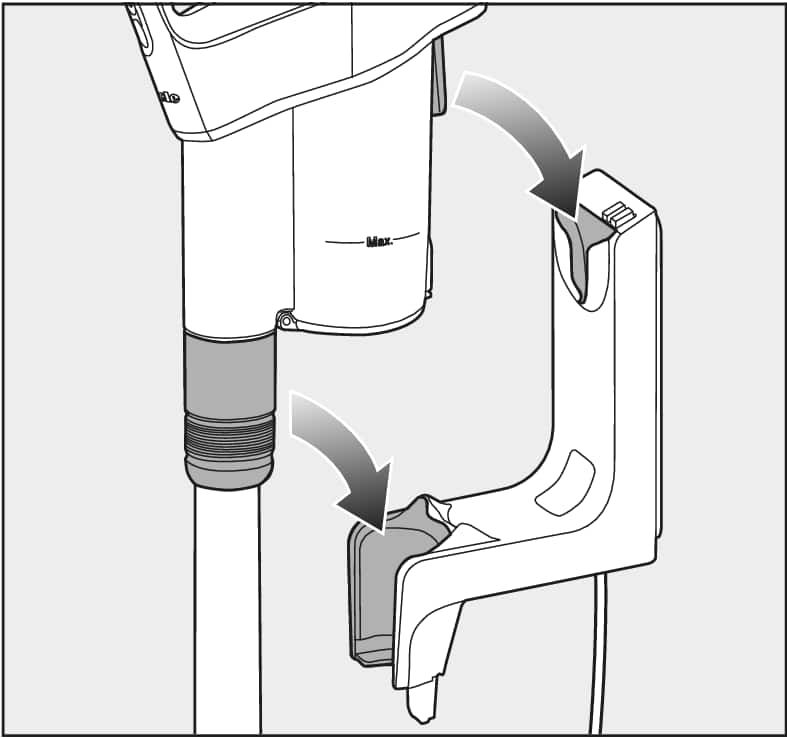
Place the vacuum cleaner into the wall bracket, making sure it fits properly.
Plug the charger into the power socket.
The charging process will start.
Internal system fault.
Check the vacuum cleaner airways for any blockages.
Clean the dust container, pre-filter and fine dust filter.
Wait for approximately 30 minutes before switching the vacuum cleaner back on again.
Cleaning the dust container, pre-filter and fine dust filter
Filter system:
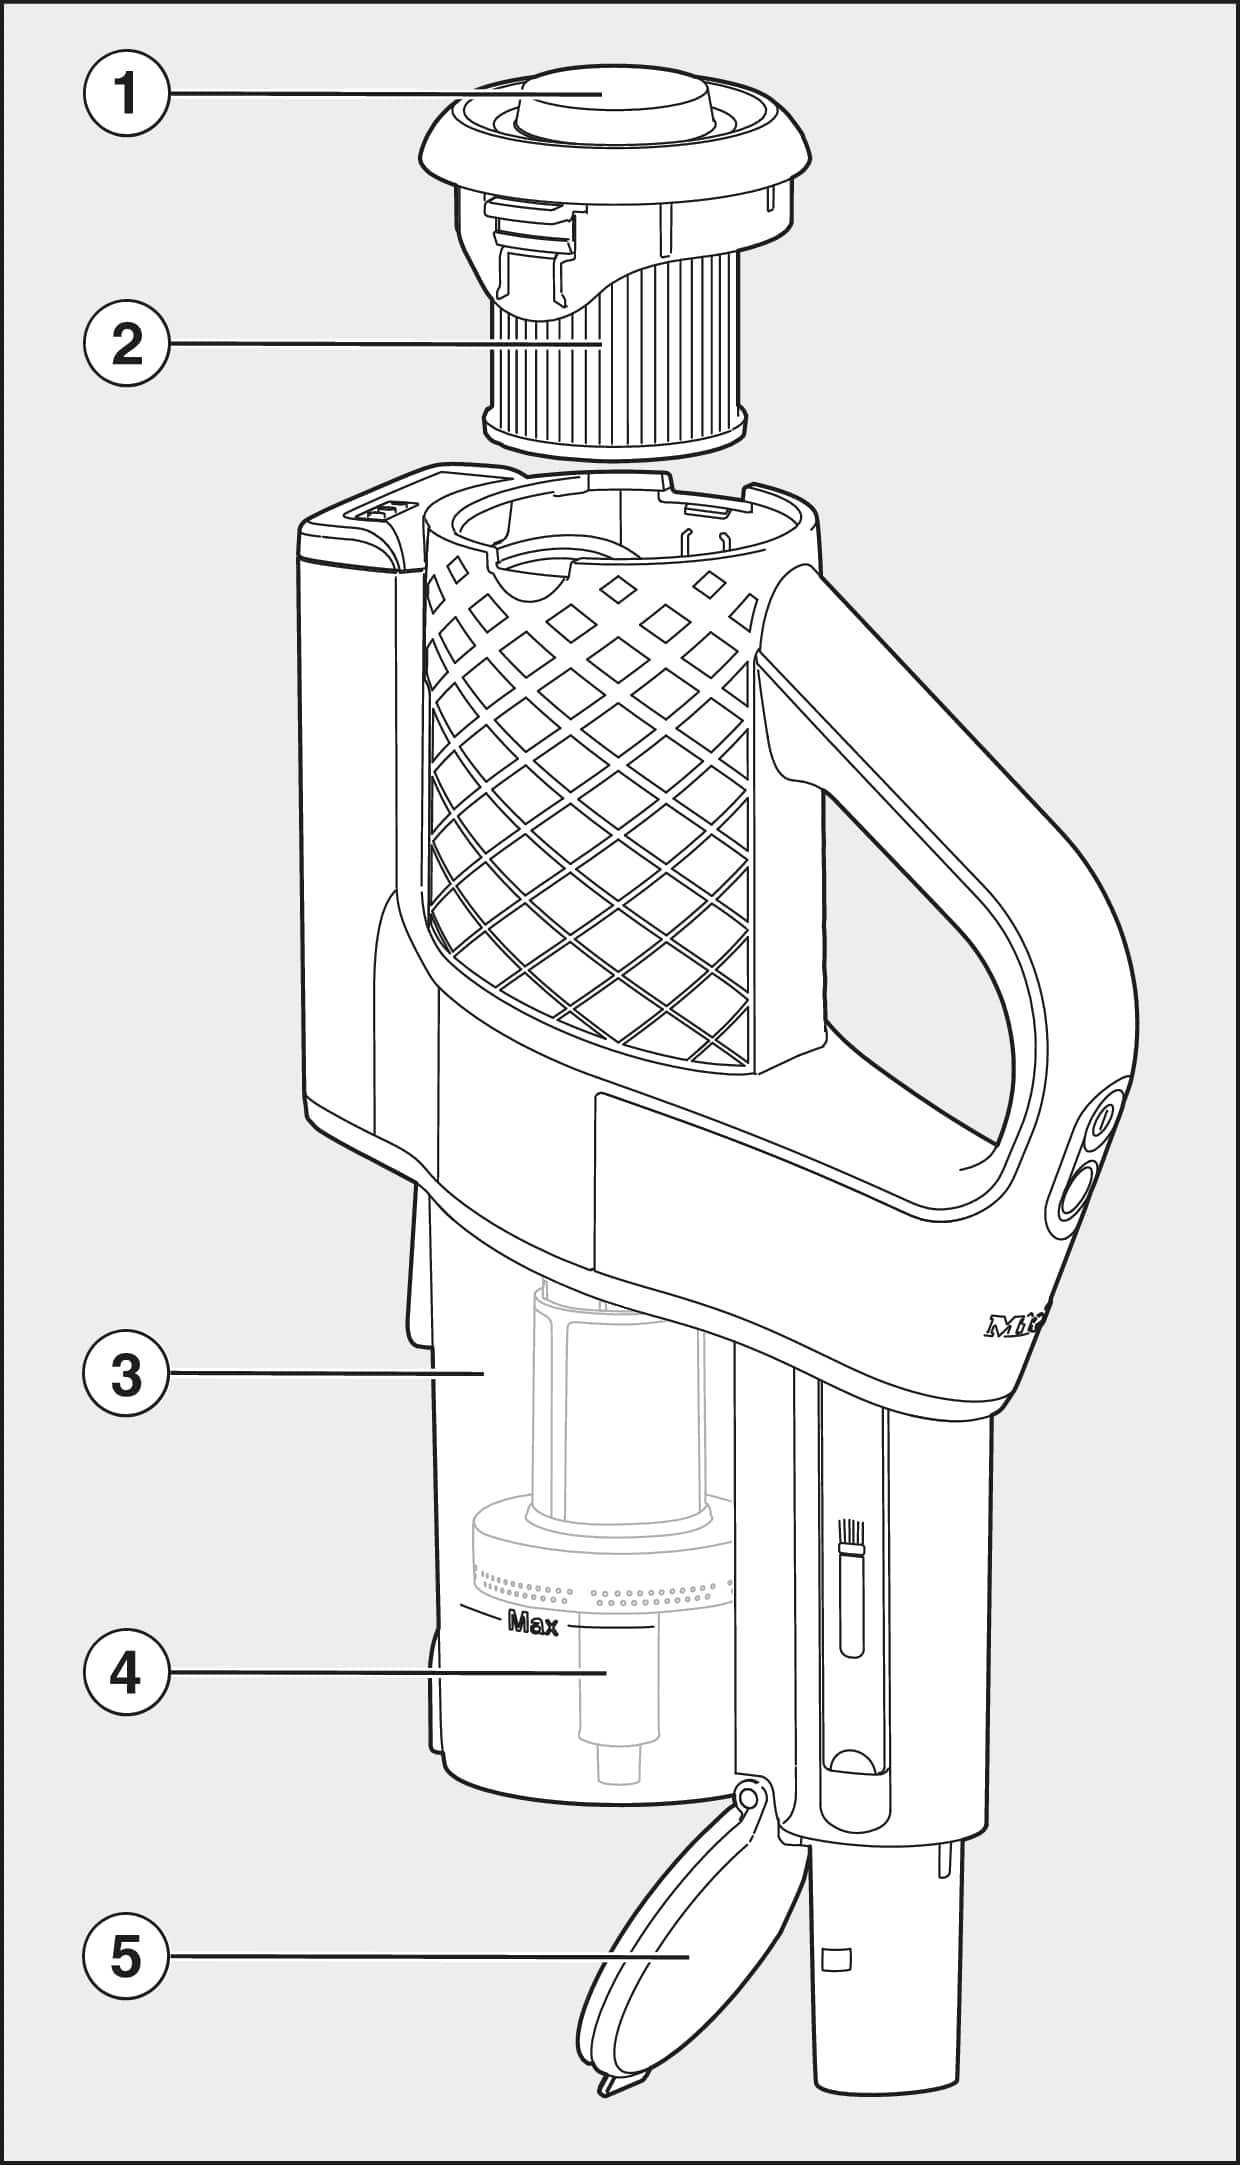
1. Screw cap
2. Fine dust filter
3. Dust container
4. Pre-filter
5. Dust container flap
1. Activating the ComfortClean self-cleaning function:
Always carry out interim cleaning on the fine dust filter before emptying the dust container. You should also do this whenever the suction power begins to drop. This enables the vacuum cleaner to achieve the very best cleaning performance again straight away.
Turn the screw cap 3 times by 180°.
When turning the cap, you will hear a noise, which is a normal part of how the ComfortClean self-cleaning function works.
2. Cleaning the dust container and pre-filter:
Empty the dust container at the latest when the dust has reached the Max. marking on the dust container.
Hold the dust container close to the bin to prevent dust from billowing out.
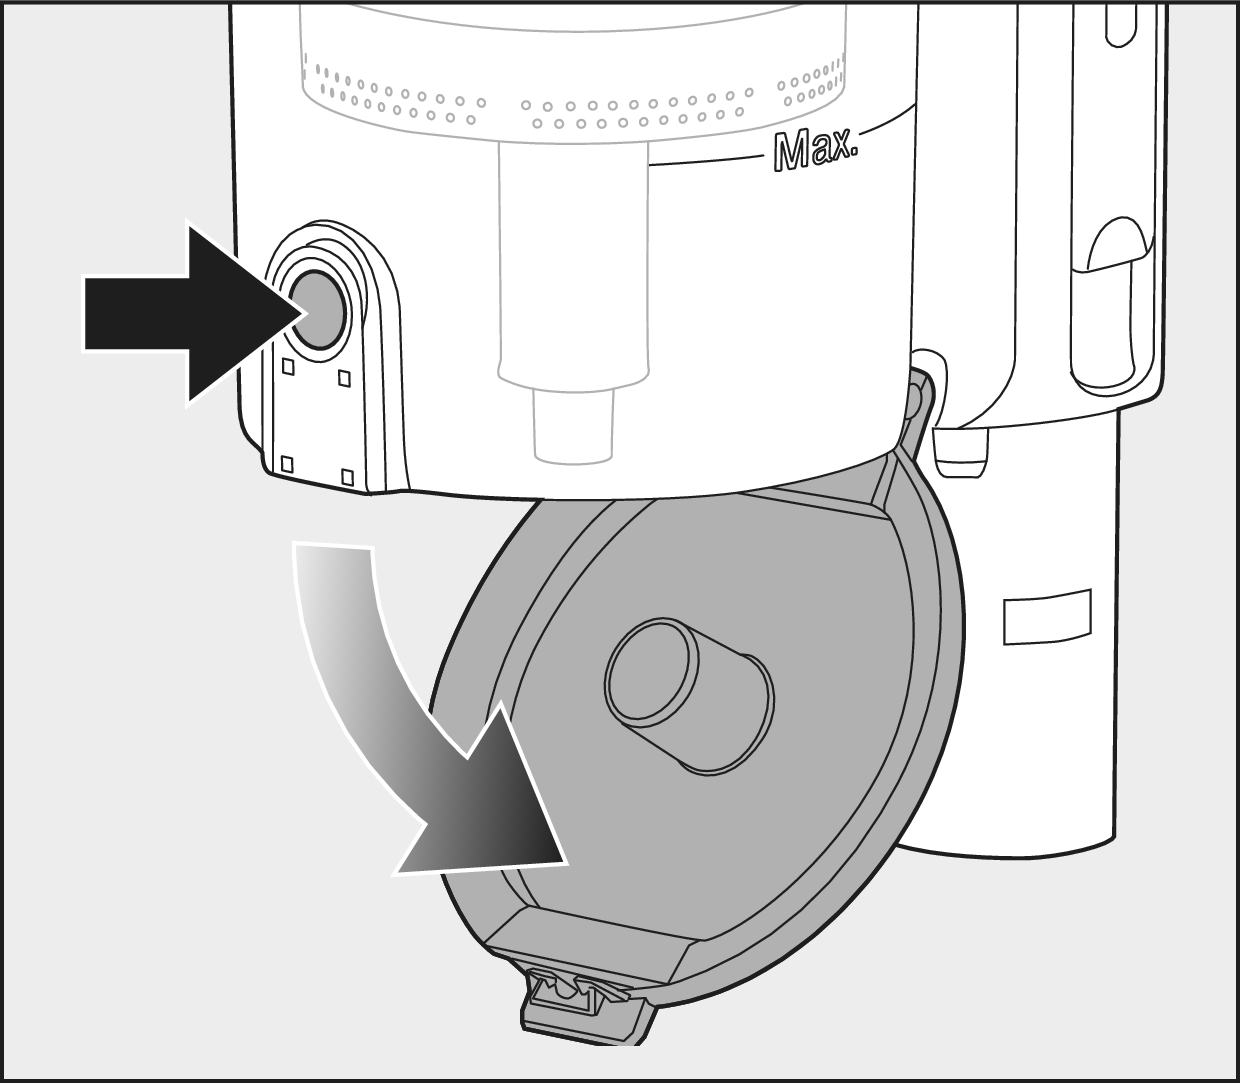
Press the release button on the bottom of the dust container.
The flap will open and the dust will fall out.
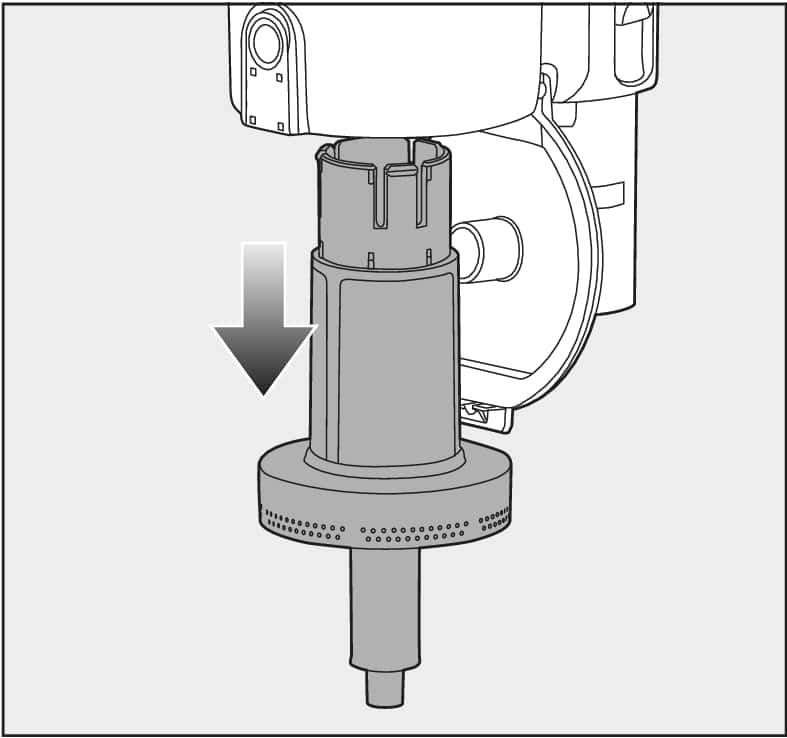
Remove the pre-filter by pulling it downwards.
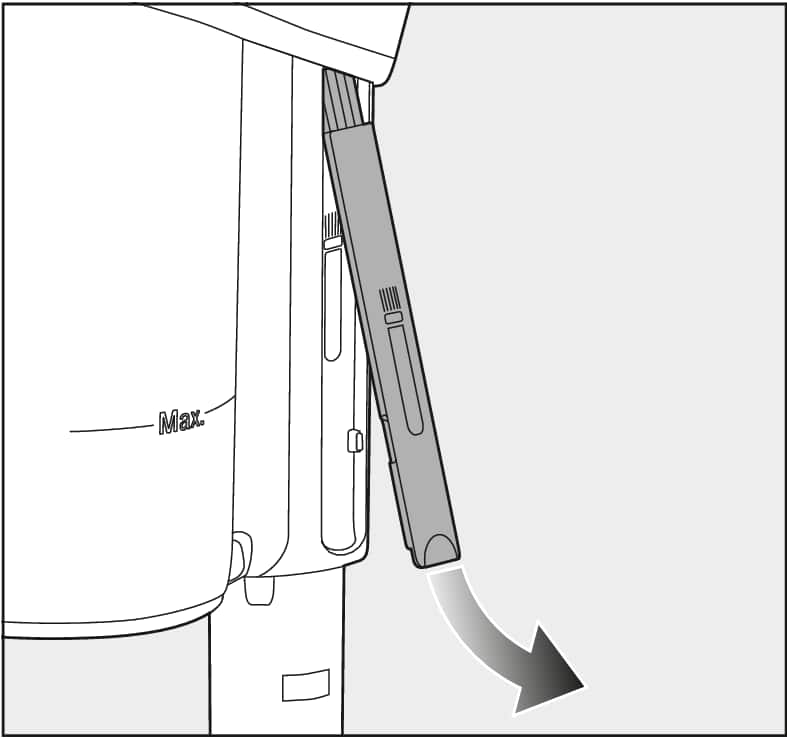
Clean the dust container and pre-filter with a dry cloth or with the cleaning tool which is located on the side of the PowerUnit.
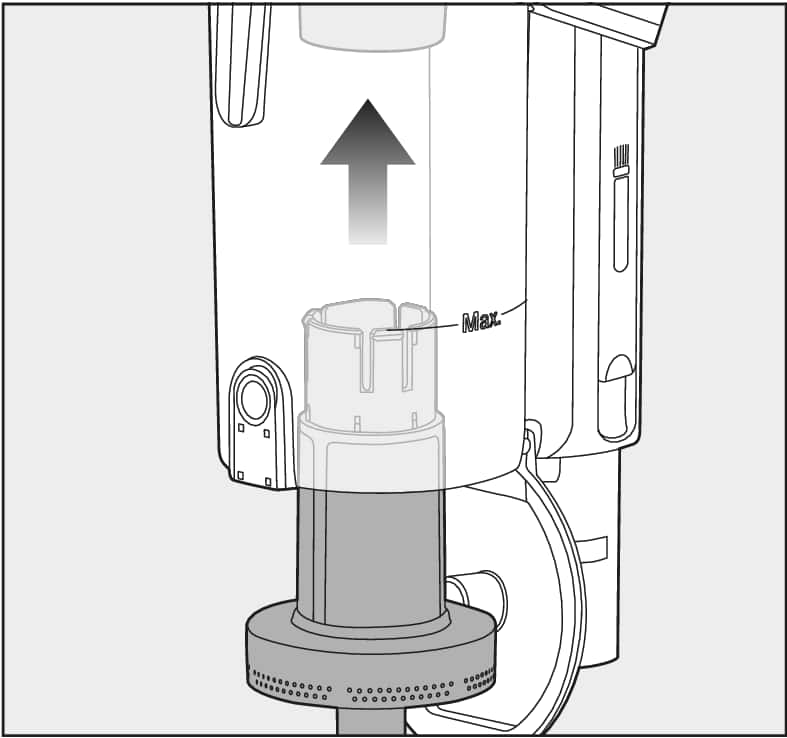
Reinsert the cleaned pre-filter into the cleaned dust container as far as it will go.
Close the dust container flap, making sure it clicks into place.
3. Cleaning the fine dust filter:
Clean the fine dust filter thoroughly at least once every 3 months outside the PowerUnit.
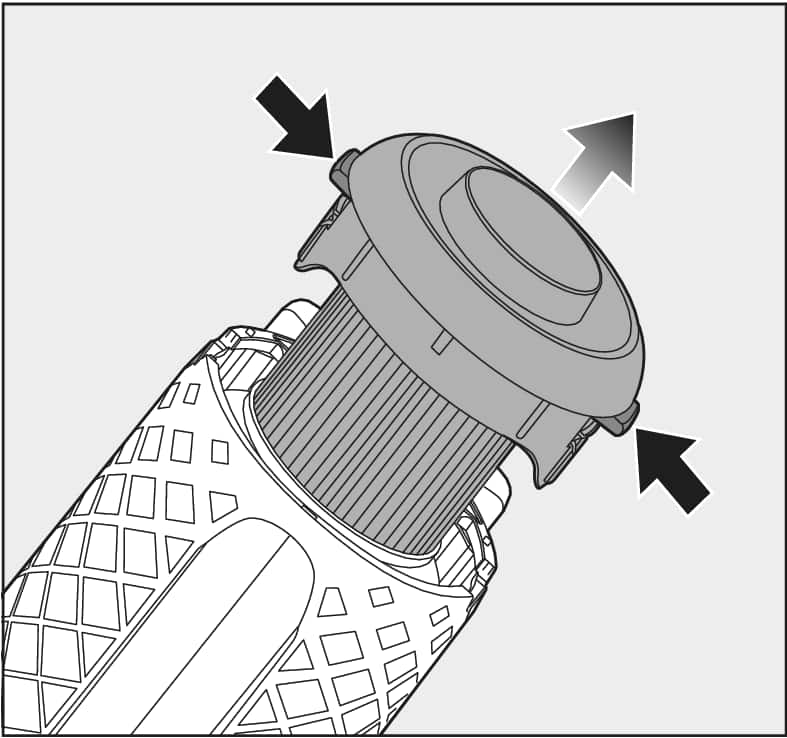
Press both release buttons at the side of the fine dust filter lid and remove the fine dust filter by pulling it upwards.
Hold the fine dust filter over a bin.
Take hold of the black section of the fine dust filter underneath the screw cap and turn the screw cap 10 times through 180°.
When turning the cap, you will hear a noise, which is a normal part of how the ComfortClean self-cleaning function works.Empty the fine dust filter by carefully tapping the lower edge.
Turn the fine dust filter slightly while you do this to free the dirt from all of the crevices.
Refit the cleaned fine dust filter into the PowerUnit, making sure it clicks into position.
To continue achieving the best possible cleaning results, replace the fine dust filter (HXFDF 20) with a new one after approx. 3 years.